
Last week, we went over the theory on using OAuth for Authentication server-side. In this article, we’ll first register the application on Google, and then we’ll add OAuth in the Kotlin Spring Boot application. Finally, we’ll try it out, check out all the information we get back from the OAuth server, and use its response to store the useful user information we get from Google in our database.
Registering on Google
Since there are not that many steps required in the Spring Boot integration, we can first already get the registration done on Google side. As was explained in the theory article, we can see OAuth as a way of the user authorizing the application to use certain information about him. Therefore, Google needs to know what information is potentially requested on the site, in order for the user to be able to make an informed decision.
Keep in mind that the user has the right to revoke these authorizations at any time.
The first step is to go over to the Google API console, and click on Create project.

Provide a name for your project.
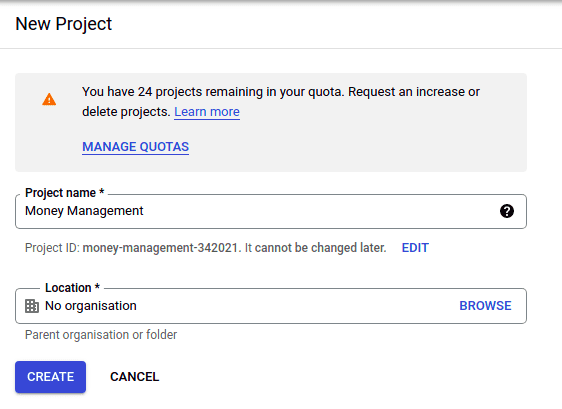
You next need to configure the Authorization consent screen your users should see.

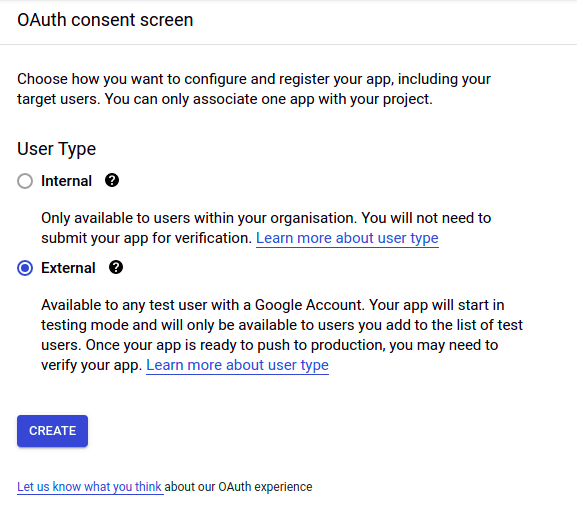
Choose the type of application you’d like. For our case, we want an external application. This will require an explicit approval by Google once the application goes into production, but a certain number of test users can already access it.
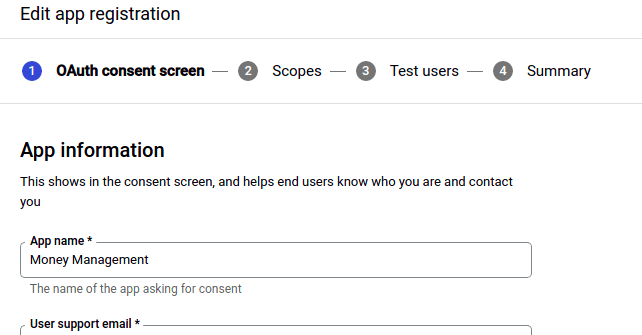
Provide a name and some basic contact data for the application. This is the name the user will see when they consent for the usage.
Choose the information you’d like from the user. We select here the email and the public data for the user (not ticked yet in the picture)

Define the test users who can already access the application before Google has reviewed the app.
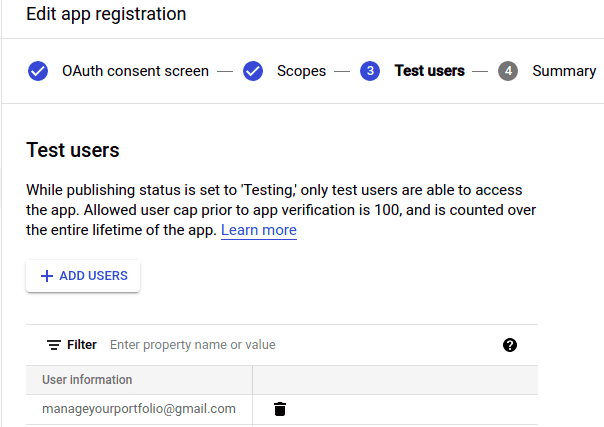
Finally, on the last page, you can see the data you’ve entered, in a summary. If you now click on Back to dashboard, you can see the information again. If you browse back to the Credentials tab, you can again click on Create credentials and select the OAuth client ID.

Not much more is required though. You only select the type of application you’d like (so we select Web Application), provide a name, and you’re done.
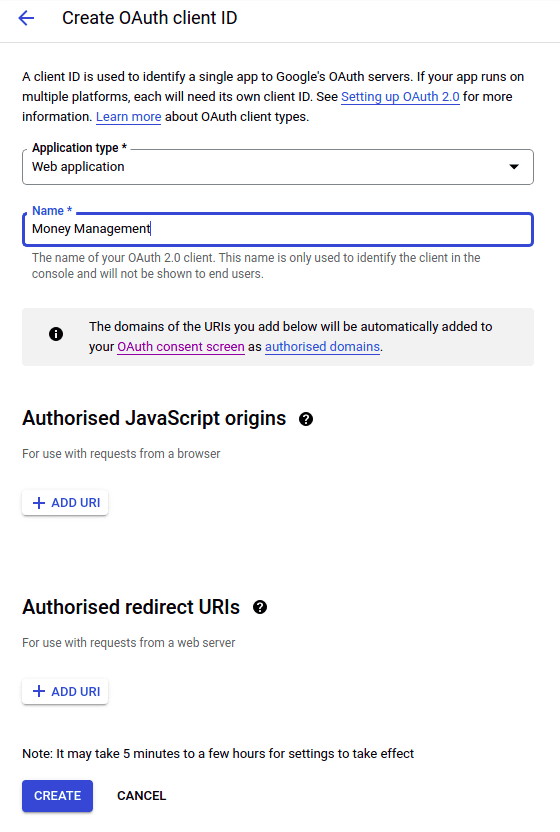
After clicking create, you are then presented with the client id and the client secret. Copy these values, as those will be required in the integration.
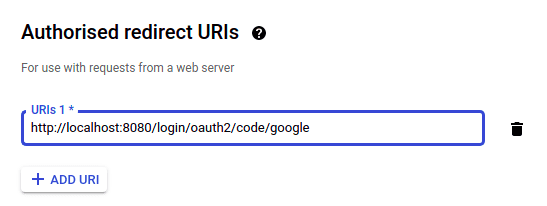
One additional step is useful though. Google will need a URI to redirect to if the authorization has been approved. By default,
Spring will redirect to /login/oauth2/code/{registrationId}. For Google, we will therefore define it as
http://localhost:8081/login/oauth2/code/google. In order to add this, edit the created OAuth Client ID and add it, as shown
below.
Adding OAuth
In order to start using anything OAuth related, we first need to add OAuth in the pom.xml:
<dependency>
    <groupId>org.springframework.boot</groupId>
    <artifactId>spring-boot-starter-oauth2-client</artifactId>
</dependency>
Now we can add the security configuration in the application.yaml. Fortunately, Google (and Facebook as well) is so popular
that Spring even has the configuration options predefined. For this, add the following part:
spring:
  security:
    oauth2:
      client:
        registration:
          google:
            client-id: ${yourId}
            client-secret: ${yourSecret}
Once these properties have been added for at least one client, all the necessary OAuth2.0 beans are instantiated, and we can define
the necessary oauth2Login settings. We will do this in our AppWebSecurityConfigurerAdapter. We previously disabled the
security on all our endpoints. Now, we will remove one of the values (ideally a GET value, as those can be more easily
accessed from the browser), and instead require authentication for those endpoints.
@Component
class AppWebSecurityConfigurerAdapter : WebSecurityConfigurerAdapter() {

    override fun configure(web: WebSecurity?) {
        web?.ignoring()?.antMatchers("/actuator/*", "/users", "/users/**", "/error/**")
    }

    override fun configure(http: HttpSecurity) {
        http.authorizeRequests()
            .anyRequest().authenticated()
            .and()
            .oauth2Login()
    }
}
Testing it out
Okay, now we need to check whether it works. You may have noticed that there are certain endpoints that I left in the
ignoring part of the Web Security. So first, I will check that these endpoints remain accessible for users who are not
authorized. So, I navigate to http://localhost:8080/users/babb8919-6a1a-40c8-b171-44632d96c887, and I am greeted by the
very nice 404 error page. So this is a success already - the user is not asked for authorization! The 404 is normal, we haven’t
added any users, I’ve simply taken a random UUID.

You can also navigate to http://localhost:8080/actuator/health, if you want to get a successful response. The application should state that it’s nicely up and running!
Now, the next step. We will go to any other page. However, ideally, we’ll navigate to one that exists. In this case, I’ve selected http://localhost:8080/accounts.
Awesome! We get redirected to a page where a Google login is requested!
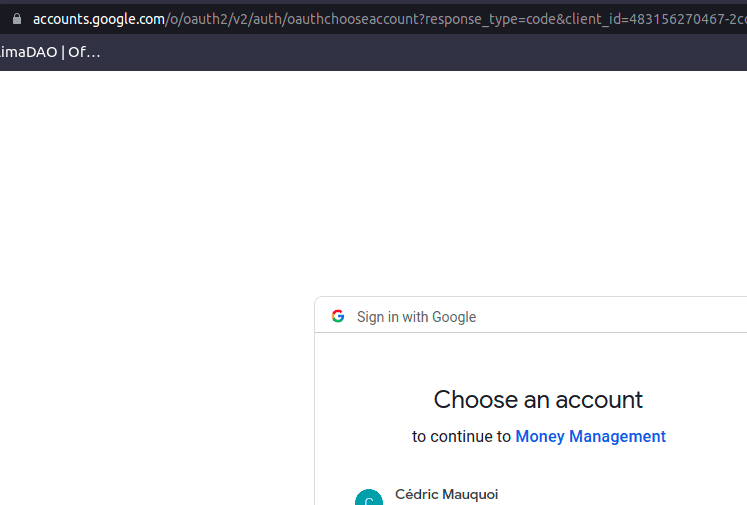
Now we can safely navigate to other pages that are also protected, and the browser will pass the user token along every request. This is pretty neat - we now have knowledge about the user, and the user can use our app with one single click!
Storing the user
We’ve already accomplished a lot now - the user can use our application in an extremely convenient way. However, there is still something that’s not quite there yet. The user may be passing us his token, and we have some knowledge about him, but he does not yet have an actual user profile!
There is a major distinction between what we have - a user credential, and what we’d like to have - a user profile. With the credential, we are really only getting some information from the user profile that Google has. We would want to have our own user profile in the app as well though, as this is then a profile where the user can define his preferences, manage his accounts in, etc.
Now, let’s make sure that we have everything that we need of the user. In order to do so, I make a simple breakpoint in any
place where the user would be logged in, and use the debugger to check the SecurityContextHolder in which Spring
stores everything it has on the maker of the request. The image with some of the data is below, gathered by evaluating
SecurityContextHolder.getContext().
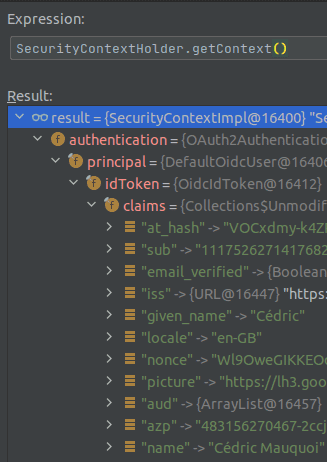
We can see that we have plenty of information that we’d need of the user. Most notably, we have his email address, which is what we’d request also if we were to make a username and password login option. (The email is not in the image, as I want to hide my private email :) ). The question that remains is - how do we get this inside our database to create the user?
Well, for this, we can make use of the nifty .successHandler() method on the OAuth login, where we can provide our custom
implementation of Spring’s AuthenticationSuccessHandler. In there, we can verify whether the user already exists and enrich him
with the info we’d like, or create him, if he does not yet exist. The solution would look as follows.
First, we add the customized SuccessHandler:
@Component
class OAuthAuthenticationSuccessHandler @Inject constructor(private val userRepository: UserRepository): AuthenticationSuccessHandler {
    override fun onAuthenticationSuccess(request: HttpServletRequest, response: HttpServletResponse, authentication: Authentication) {
        val userInformation = (authentication.principal as DefaultOidcUser).idToken
        userRepository.findUserByEmail(userInformation.email) ?: userRepository.save(User(email = userInformation.email,
            username = userInformation.fullName,
            firstName = userInformation.givenName,
            lastName = userInformation.familyName
        ))
    }
}
Of course, this requires the following addition in the userRepository:
fun findUserByEmail(email: String): User?Next, we add this in the security setup:
@Component
class AppWebSecurityConfigurerAdapter @Inject constructor(private val oAuthAuthenticationSuccessHandler: OAuthAuthenticationSuccessHandler)
    : WebSecurityConfigurerAdapter() {

    override fun configure(web: WebSecurity?) {
        web?.ignoring()?.antMatchers("/actuator/*", "/users", "/users/**", "/error/**")
    }

    override fun configure(http: HttpSecurity) {
        http.authorizeRequests()
            .anyRequest().authenticated()
            .and()
            .oauth2Login()
            .successHandler(oAuthAuthenticationSuccessHandler)
    }
}
Let’s start the application again. The first time we make a request, the server will ask us to log in. Great, we do just that.
Then, we refresh the page, and notice we do not arrive into the OAuthAuthenticationSuccessHandler again. If we evaluate at any
place where we have access to the UserRepository, we can see through the debugger that indeed a user has been created.

The last check to determine that everything has been successful is done by repeating all the previous steps on a different browser. Here, we can check that no new user is created, but instead, the user is logged in with the previously created profile!
Note that there are other ways as well to store the user data. We could make a request to a custom token endpoint, a redirection endpoint, the user information endpoint, and so on. There is a vast amount of options available.
The one, final step to take on, is to redirect the user to whatever page he wanted to access after the login. You may notice that now, after logging in, the page gets stuck on some login url, which is rather unpleasant. The reason for this is that we have defined our own logic for the successful login, and Spring leaves us be. So, how can we solve that?
Well, fortunately, we can use some more Spring magic, or at least some logic it is ready to provide for us. We can make use of
some simple predefined AuthenticationSuccessHandler. We are going to use the SavedRequestAwareAuthenticationSuccessHandler here,
but the SimpleUrlAuthenticationSuccessHandler or the ForwardAuthenticationSuccessHandler would work all the same.
Since these classes already implement the AuthenticationSuccessHandler, we can replace that implementation with the extension,
so that our SuccessHandler looks as follows:
@Component
class OAuthAuthenticationSuccessHandler @Inject constructor(private val userRepository: UserRepository):
    SavedRequestAwareAuthenticationSuccessHandler() {
    override fun onAuthenticationSuccess(request: HttpServletRequest, response: HttpServletResponse, authentication: Authentication) {
        val userInformation = (authentication.principal as DefaultOidcUser).idToken
        userRepository.findUserByEmail(userInformation.email) ?: userRepository.save(User(email = userInformation.email,
            username = userInformation.fullName,
            firstName = userInformation.givenName,
            lastName = userInformation.familyName
        ))
        super.onAuthenticationSuccess(request, response, authentication)
    }
}
Now, if we log in one more time after restarting our application, we will create our new user, and afterwards serve the user with the content he was expecting!
In the next posts, we will make use of our user concept to change the endpoints to leverage them, to link the created entities to them, and also make the front-end aware of this concept. A whole new realm of possibilities and features opens up to our application now!