
This is part 2 of the series on how to create a blog with Gatsby and Netlify, and will explain how to get your Gatsby-powered blog published on Netlify. Part 1 goes into detail for the setup can be found here.
Let’s assume that you have a blog that you’ve been working on for a bit, locally, and you think the time has come to publish it on the web. If you’ve done your research, you will see that there is a plethora of options for web-hosting out there. Maybe you’re even bombarded with YouTube ads by now - I know I am…
In my opinion, one of the best options out there is Netlify.
What is Netlify?
Netlify is, in its essence, a web hosting company for static websites on the cloud. It boasts multiple integrations that aim to make the developers’ life as easy as possible.
On top of its great ease-of-use, the hosting is even entirely free for small, personal projects!
What makes it so easy to use?
Netlify enables you to connect your Github (naturally, also GitLab or Bitbucket) repository to a project on their site,
which it will then pull, build, and pre-render all pages into static HTML. Depending on the configuration,
it will do this upon every push to the main branch, or only when triggered manually.
Netlify also allows great UX for people viewing sites, by giving them blazingly fast rendering times. Their dedicated CDN receives the entire static site and is distributed globally. This, in turn, results in the fact that hardly any requests need to be made back to the servers, and therefore the users gets the rendered site extremely quickly from the closest geographical location.
Developers love Netlify, because it integrates many tools of the JAMstack: JavaScript, APIs, and Markup.
CI/CD is not just a buzz-word when it comes to Netlify. While you can declare your own pipelines, Netlify offers a large amount of pipelines right out of the box. The Gatsby integration is just one of many.
Easy setup of security measures is another advantage it has. Let’s Encrypt is, of course, always a free way to protect your site with SSL certificates, but the easy setup with only a single click of a button is quite nice.
Also, did I mention it’s free?
What should you use it for?
- Hosting blogs
- Online Campaigns
-
Anything where static sites are simply enough
Every company, or even person, thinks that their application is special, and that a static site will not satisfy their needs. While this may be the case for certain dynamic websites, this way of thinking does not apply to landing or marketing pages. These are generally also the pages where changes are more frequent, so they can be the static pages, while the dynamic content is in a subdomain of the application. A blogpost on reasons why your site should be static by Netlify themselves explains it perfectly.
Getting started
First, browse to Netlify itself and sign up. You can do this with one of the main git repository sites, or simply through email.
After your email verification, you can provide Netlify with some basic information about what you want to use them for. Afterwards, you’re already in the dashboard.
You may have noticed that at no point you were asked to provide credit card information or something similar, yet you can already get started. At the top of the screen, you can see the monthly usage. At the right, you can then link your Git repo. Your home screen may look slightly different, since I already have some builds in there.
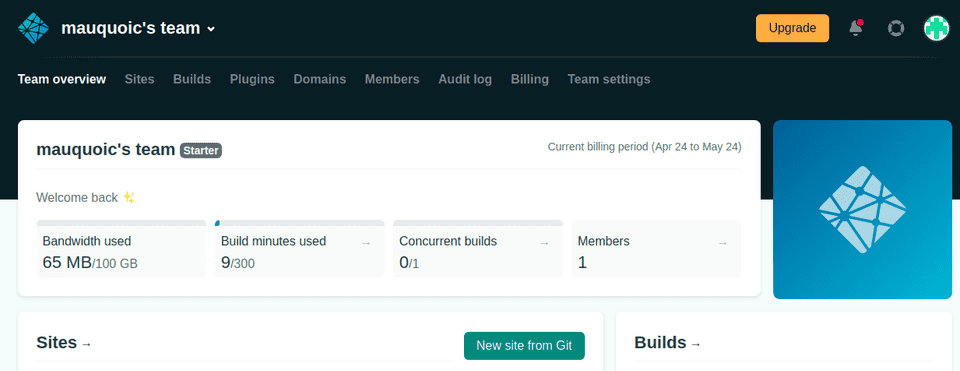
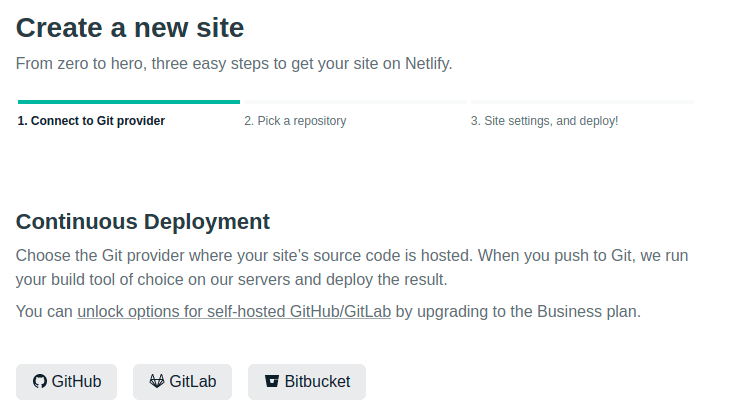
Pressing on the “New site from Git” button, you will be asked to specify your git provider. Only GitHub, GitLab and Bitbucket are currently free, but that should be sufficient for almost all people working on their own project.
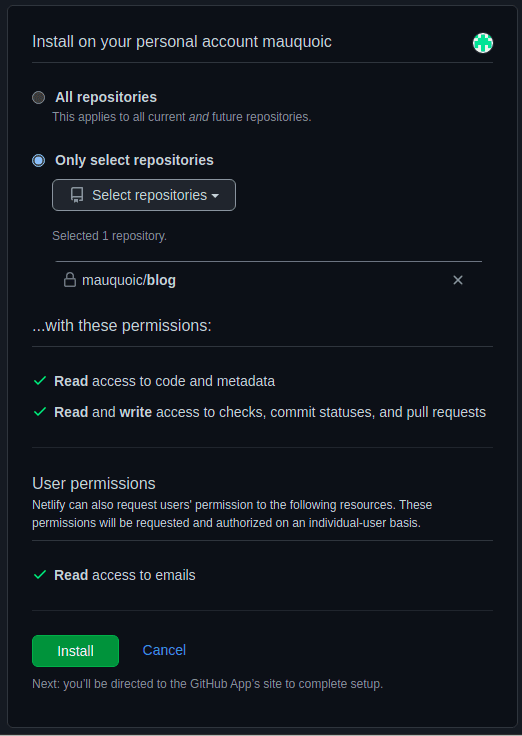
If you have a private repository for your blog, like me, you need to authorize Netlify to access it first. This has been streamlined as well though, so there’s just a few clicks more you need to do.
Now that you’ve chosen the repository that the blog is on, you get to the third step of the site settings. Here, just go with the defaults, click deploy site, and you’re all done! You’ll see the cute picture with the smiling directory, which seems like a good sign. All you need to do is wait a couple of minutes (it took 3 minutes in my case), and boom - you have your site officially online!

During the waiting, feel free to check out the logs of the deployment. Next to it, you can also see deployment previews of potential pull requests, which is actually pretty cool. These don’t cost you any build time or builds, but you can still check out the site.
When the build is complete, you can click on the link to check out your site.

Hold on a second though! All you see is some strange looking URL like https://compassionate-bohr-ef1e4a.netlify.app. How are you ever going to remember this? Obviously, you want to view it on the official domain that you’ve bought!
Link the domain
Fortunately, Netlify even guides you through the next steps, and you can link your website to your custom domain. (If you have not yet bought a domain, you can do so at a number of registrars, and supposedly even on Netlify itself if you don’t have it yet. I have not attempted this, however.) Just click the “add a custom domain to your site” link, enter your domain, and set up the name servers at your domain registrar.
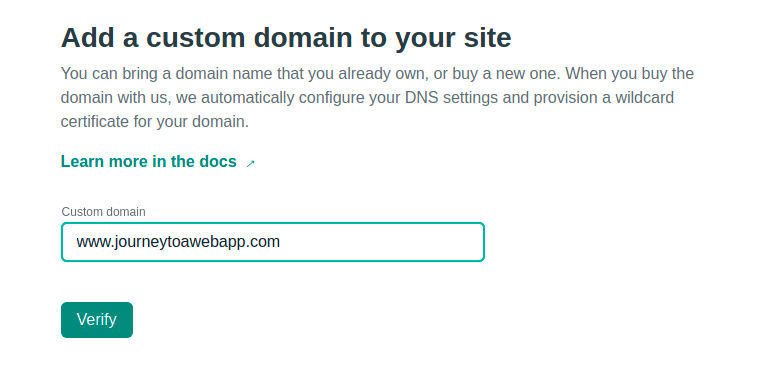
Another few minutes of patience, and you’ve now got a pretty URL that you can share with everyone.

Additionally to your www.${yourwebsite}, you should add your website without the “www” part, since not everyone uses this by default. Netlify will make the link between both, with the DNS setup and everything.
One final step is still advised to do, and that is setting up the https encryption. At the bottom, you can click the “Verify DNS configuration” button, and then confirm by pressing “Provision certificate”. You now have a TLS certificate from Let’s Encrypt for free, and your website looks much more professional with https. Keep in mind that this may not work immediately, because the DNS servers need to be fully set up first (there is nothing required here on your end, except for a couple of minutes of patience).
It’s very impressive how easy this all was. The blog is working, and you can impress all your friends and relatives! If you’re anything like me though, you want to verify whether that CI/CD pipeline that Netlify is associated with really is all it’s made out to be. So, just create an additional blog post, and push it to your main branch. If you go back to the “Builds” tab, you will notice that a new build was triggered immediately. Or you can even see it right on your home dashboard.
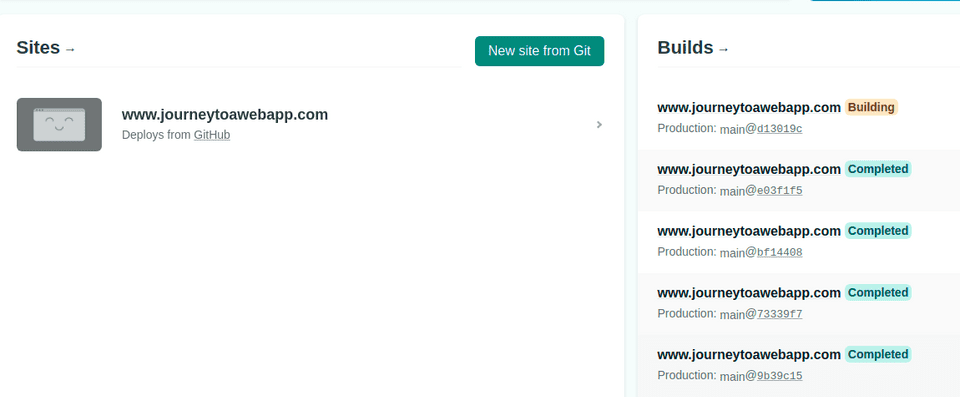
Again, a minute or two of patience, refresh the page when the deployment is done, and you have an additional post.
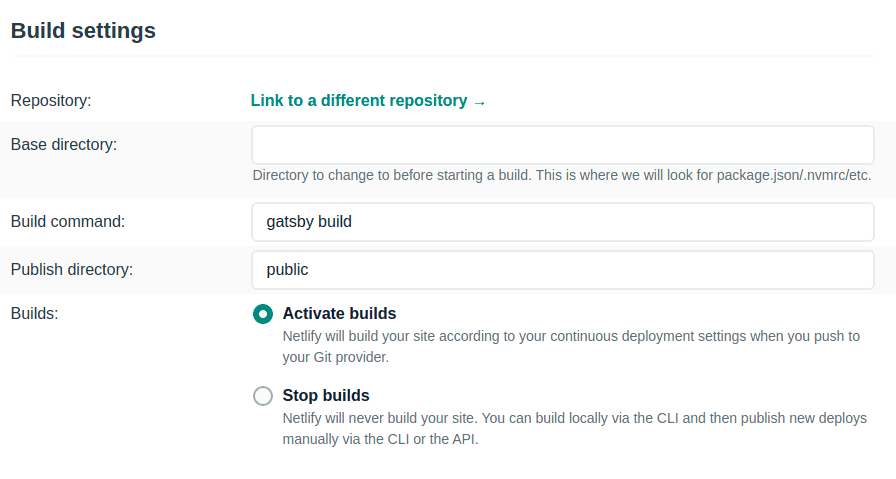
If you do not want Netlify to automatically build on a push of the main branch, you can change this under “Sites (choose your site)” > “Site settings” > “Build & deploy” > “Continuous Deployment” and pressing edit. Here you have a wide array of choices on items you can change for building, deploying, etc.
So there you are! You have a blog, and nothing is stopping you from using it to satisfy your fancy. Congratulations, and much success and enjoyment to you and your blog!